 第18章 为平台、玩家动画和控制功能编写代码
# 第18章 为平台、玩家动画和控制功能编写代码
在本章中,我们将为平台、玩家动画和控制功能编写代码。在我看来,我们已经完成了艰难的部分,接下来的大部分工作投入产出比都更高。希望本章会很有趣,因为我们将看到平台如何让玩家站立在上面并使其能够奔跑,还会看到我们如何循环播放动画帧,为玩家创造流畅的奔跑效果。
我们将完成以下内容:
- 为平台编写代码:你猜对了。需要两个类,一个继承自
Update类,另一个继承自Graphics类。 - 为玩家添加功能。
- 编写
Animator类。 - 为玩家动画编写代码:为玩家添加流畅的奔跑动画。本章完整的代码在
Run4文件夹中。
# 编写平台相关代码
首先,创建本章所需的两个类,分别是继承自 Update 的 PlatformUpdate 类和继承自 Graphics 的 PlatformGraphics 类。我们已经有了与玩家相关的类,完成平台相关代码编写后,会向这些类中添加更多代码。不过,我们还需要一个 Animator 类来控制玩家的动画,在项目后续阶段,它还将控制火球的动画。你可以现在创建一个空的 Animator 类,也可以等我们编写它的时候再创建。
# 编写PlatformUpdate类
平台的大部分功能是处理与玩家的碰撞。如果玩家的脚碰到平台顶部,那么玩家不应穿过平台。如果玩家的右侧碰到平台的左侧,也不应穿过,以此类推。下图展示了 PlatformUpdate 类要实现的功能。
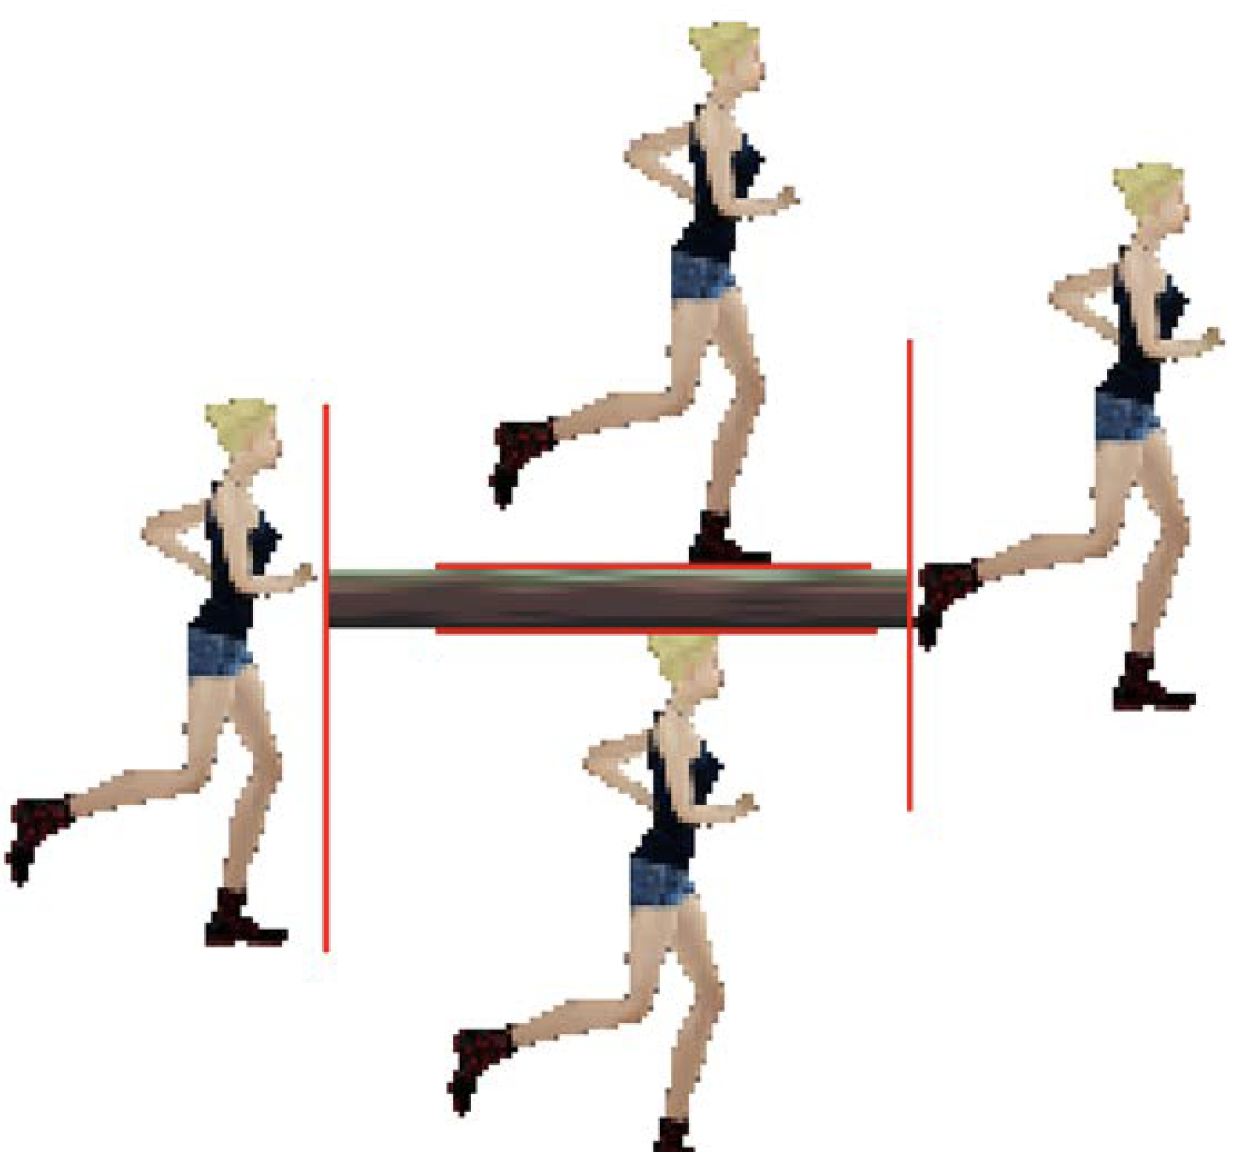 图18.1:平台与玩家碰撞
在上图中,红线表示 PlatformUpdate 类将检查重叠的位置,每个玩家图像的位置表示参与该交叉的玩家边缘。当检测到交叉时,玩家将被移动到最近的非交叉点(红线处),从而使平台对玩家来说就像一个实体物体。
在 PlatformUpdate.h 中添加以下内容:
#pragma once

#include "Update.h"
#include "SFML/Graphics.hpp"
using namespace sf;

class PlatformUpdate : public Update
{
private:
    FloatRect m_Position;
    FloatRect* m_PlayerPosition = nullptr;
    bool* m_PlayerIsGrounded = nullptr;
public:
    FloatRect* getPositionPointer();

    //  From  Update  :  Component
    void update(float fps) override;
    void assemble(shared_ptr<LevelUpdate> levelUpdate, shared_ptr<PlayerUpdate> playerUpdate)
        override;
};
2
3
4
5
6
7
8
9
10
11
12
13
14
15
16
17
18
19
20
在上述代码中,我们声明了用于表示位置的变量、指向玩家位置的指针,以及一个用于判断玩家是否站在地面上的布尔值。如果玩家没有站在地面上,就不应该能够奔跑。而且,在平台类中计算玩家是否站在地面上,不是再合适不过了吗?
在公共部分,我们有 getPositionPointer 函数,它返回一个 FloatRect 实例的地址,该实例将保存平台的位置。这就是我们将所需的可操作位置传递给在第15章中编写的 LevelUpdate 实例的方式。
接下来,我们有必要的 update 和 assemble 函数。我们经常看到这些定义。接下来如何编写它们将是最有趣的部分。
在 PlatformUpdate.cpp 中添加以下代码:
#include "PlatformUpdate.h"
#include "PlayerUpdate.h"

FloatRect* PlatformUpdate::getPositionPointer()
{
    return &m_Position;
}

void PlatformUpdate::assemble(
    shared_ptr<LevelUpdate> levelUpdate,
    shared_ptr<PlayerUpdate> playerUpdate)
{
    //mPosition  = position;
    m_PlayerPosition = playerUpdate->getPositionPointer();
    m_PlayerIsGrounded = playerUpdate->getGroundedPointer();
}
2
3
4
5
6
7
8
9
10
11
12
13
14
15
16
在 getPositionPointer 函数中,我们返回 m_Position 变量的地址。
接下来,我们编写 assemble 函数,用玩家位置的地址初始化 m_PlayerPosition,这是通过使用 playerUpdate 共享指针并调用 getPositionPointer 函数获取的。
然后,我们用从 PlayerUpdate 类的 getGroundedPointer 函数获得的变量地址初始化 m_PlayerIsGrounded 指针。现在,对 m_PlayerPosition 或 m_PlayerIsGrounded 所做的任何操作,都会立即直接反映在与玩家相关的类中。
接下来,我们将编写在游戏循环每次迭代时执行一次的 update 函数。
# 为PlatformUpdate类编写update函数
要完成 PlatformUpdate 类的编写,在 PlatformUpdate.cpp 中添加以下代码:
void PlatformUpdate::update(float fps)
{
    if (m_Position.intersects(*m_PlayerPosition))
    {
        Vector2f playerFeet(m_PlayerPosition->left +
            m_PlayerPosition->width / 2,
            m_PlayerPosition->top +
            m_PlayerPosition->height);

        Vector2f playerRight(m_PlayerPosition->left + m_PlayerPosition->width,
            m_PlayerPosition->top +
            m_PlayerPosition->height / 2);

        Vector2f playerLeft(m_PlayerPosition->left,
            m_PlayerPosition->top +
            m_PlayerPosition->height / 2);

        Vector2f playerHead(m_PlayerPosition->left + m_PlayerPosition->width / 2,
            m_PlayerPosition->top);

        if (m_Position.contains(playerFeet))
        {
            if (playerFeet.y > m_Position.top)
            {
                m_PlayerPosition->top =
                    m_Position.top -
                    m_PlayerPosition->height;

                *m_PlayerIsGrounded = true;
            }
        }
        else if (m_Position.contains(playerRight))
        {
            m_PlayerPosition->left =
                m_Position.left - m_PlayerPosition->width;
        }
        else if (m_Position.contains(playerLeft))
        {
            m_PlayerPosition->left =
                m_Position.left + m_Position.width;
        }
        else if (m_Position.contains(playerHead))
        {
            m_PlayerPosition->top =
                m_Position.top + m_Position.height;
        }
    }
}
2
3
4
5
6
7
8
9
10
11
12
13
14
15
16
17
18
19
20
21
22
23
24
25
26
27
28
29
30
31
32
33
34
35
36
37
38
39
40
41
42
43
44
45
46
47
48
update 函数承担了大部分工作,下面我们来详细分析。所有代码用于检测玩家是否与平台发生碰撞、玩家的哪一部分与平台发生碰撞,以及平台的哪一部分与玩家发生碰撞。最开始的包含所有情况的 if 语句用于检测玩家和平台之间是否存在任何交叉。
if (m_Position.intersects(*m_PlayerPosition))
在上述代码中,进行了初步检查。如果玩家和平台之间的任何位置存在交叉,那么我们需要进一步测试,以确定具体发生了哪种碰撞。如果根本不存在交叉,那么我们可以跳过 update 函数中的其余代码。
如果存在某种交叉,那么接下来的代码定义了我们要测试的玩家身体部位,以便处理精确的碰撞:
Vector2f playerFeet(m_PlayerPosition->left +
    m_PlayerPosition->width / 2,
    m_PlayerPosition->top +
    m_PlayerPosition->height);

Vector2f playerRight(m_PlayerPosition->left + m_PlayerPosition->width,
    m_PlayerPosition->top +
    m_PlayerPosition->height / 2);

Vector2f playerLeft(m_PlayerPosition->left,
    m_PlayerPosition->top +
    m_PlayerPosition->height / 2);

Vector2f playerHead(m_PlayerPosition->left + m_PlayerPosition->width / 2,
    m_PlayerPosition->top);
2
3
4
5
6
7
8
9
10
11
12
13
14
15
在上述代码中,创建了四个 Vector2f 实例:playerFeet、playerRight、playerLeft 和 playerHead。通过调用 Vector2f 构造函数并传入 m_PlayerPosition 指针中的适当值来初始化这些实例,m_PlayerPosition 指针指向 PlayerUpdate 类中的 m_Position 变量。
接下来的 if 和三个 else-if 语句分别处理每种碰撞情况(头部、左侧、右侧和脚部):
if (m_Position.contains(playerFeet))
{
    if (playerFeet.y > m_Position.top)
    {
        m_PlayerPosition->top = m_Position.top -
            m_PlayerPosition->height;

        *m_PlayerIsGrounded = true;
    }
}
else if (m_Position.contains(playerRight))
{
    m_PlayerPosition->left =
        m_Position.left - m_PlayerPosition->width;
}
else if (m_Position.contains(playerLeft))
{
    m_PlayerPosition->left =
        m_Position.left + m_Position.width;
}
else if (m_Position.contains(playerHead))
{
    m_PlayerPosition->top =
        m_Position.top + m_Position.height;
}
2
3
4
5
6
7
8
9
10
11
12
13
14
15
16
17
18
19
20
21
22
23
24
25
在上述代码中,当脚部交叉时,将其与平台顶部对齐;当右侧交叉时,将其与平台左侧对齐;当左侧交叉时,将其与平台右侧对齐;当头部交叉时,将其与平台底部对齐。回顾前面的图片,就能直观地理解这是如何使平台对玩家来说成为一个无法穿透的实体物体的。
游戏中的其他实体,比如火球,可以穿过平台,因为这在我们的游戏中是可行的。但如果我们希望的话,获取所有火球的指针并处理它们或游戏中任何其他实体的碰撞也是很容易实现的。
现在,我们只需要为平台赋予外观。
# 编写PlatformGraphics类
接下来,我们可以编写PlatformGraphics类,它将以可视化的方式呈现PlatformUpdate类中的数据。在PlatformGraphics.h中添加以下内容:
#pragma once

#include "Graphics.h"

#include "SFML/Graphics.hpp"
using namespace sf;

class PlatformGraphics : public Graphics
{
private:
	FloatRect* m_Position = nullptr;
	int m_VertexStartIndex = -1;

public:
	// 继承自Graphics : Component
	void draw(VertexArray& canvas) override;

	void assemble(VertexArray& canvas,  shared_ptr<Update> genericUpdate, IntRect texCoords) override;
};
2
3
4
5
6
7
8
9
10
11
12
13
14
15
16
17
18
19
在上述代码的私有部分,有一个名为m_Position的FloatRect指针,它将指向PlatformUpdate类,并保存平台的当前位置。请记住,平台的位置将由LevelUpdate类定期重新定位,LevelUpdate类持有所有平台位置的向量。
m_VertexStartIndex整数的作用和往常一样,用于记住此实体的四边形在VertexArray中的起始位置。
在公共部分,对于扩展Graphics类的类,我们通常有两个函数。一个是draw函数,它接受一个指向VertexArray的引用;另一个是assemble函数,用于准备每个平台,并且在每个平台实例创建时由工厂调用。在完成这个类之后,我们将编写与工厂相关的代码。
现在,我们可以编写两个重写函数的定义。在PlatformGraphics.cpp中添加以下内容:
#include "PlatformGraphics.h"
#include "PlatformUpdate.h"

void PlatformGraphics::draw(VertexArray& canvas)
{
    const Vector2f& position = m_Position->getPosition();
    const Vector2f& scale = m_Position->getSize();

    canvas[m_VertexStartIndex].position = position;
    canvas[m_VertexStartIndex + 1].position =
        position + Vector2f(scale.x, 0);
    canvas[m_VertexStartIndex + 2].position =
        position + scale;
    canvas[m_VertexStartIndex + 3].position =
        position + Vector2f(0, scale.y);
}
2
3
4
5
6
7
8
9
10
11
12
13
14
15
16
在我们刚刚编写的draw函数中,我们需要做的就是使用m_Position指向的值初始化VertexArray的相应索引。虽然在游戏的大多数帧中,平台不会移动,但我们仍然初始化VertexArray,因为最终它是会移动的。
如果我们有数千个平台,可以通过在
PlatformUpdate类中添加一个布尔值来优化这个过程,该布尔值用于指示平台在当前帧是否移动,只有在平台移动时才执行上述代码。不过在我们的游戏中,这种优化没有必要。我只是觉得你可能想了解一下这种可能性。
为了完成PlatformGraphics类,还要在PlatformGraphics.cpp中添加assemble函数:
void PlatformGraphics::assemble(VertexArray& canvas, shared_ptr<Update> genericUpdate,
    IntRect texCoords)
{
    shared_ptr<PlatformUpdate> platformUpdate =
        static_pointer_cast<PlatformUpdate>(genericUpdate);
    m_Position = platformUpdate->getPositionPointer();
    m_VertexStartIndex = canvas.getVertexCount();
    canvas.resize(canvas.getVertexCount() + 4);

    const int uPos = texCoords.left;
    const int vPos = texCoords.top;
    const int texWidth = texCoords.width;
    const int texHeight = texCoords.height;

    canvas[m_VertexStartIndex].texCoords.x = uPos;
    canvas[m_VertexStartIndex].texCoords.y = vPos;
    canvas[m_VertexStartIndex + 1].texCoords.x = uPos + texWidth;
    canvas[m_VertexStartIndex + 1].texCoords.y = vPos;
    canvas[m_VertexStartIndex + 2].texCoords.x = uPos + texWidth;
    canvas[m_VertexStartIndex + 2].texCoords.y = vPos + texHeight;
    canvas[m_VertexStartIndex + 3].texCoords.x = uPos;
    canvas[m_VertexStartIndex + 3].texCoords.y = vPos + texHeight;

}
2
3
4
5
6
7
8
9
10
11
12
13
14
15
16
17
18
19
20
21
22
23
24
在上述assemble函数中,作为参数传入的通用Update实例被转换为PlatformUpdate实例。现在,可以通过调用platformUpdate->getPositionPointer()来初始化m_Position指针。
接着,确定并存储四边形的起始索引,并通过添加四个顶点来调整VertexArray的大小。
最后,将纹理坐标初始化为VertexArray的相应位置。现在,我们的类就可以使用了。
# 在工厂中创建一些平台
在Factory.cpp中添加以下内容来生成一些平台。首先,添加两个新的包含指令,如下所示:
#include "PlatformUpdate.h"
#include "PlatformGraphics.h"
2
现在,在为相机添加的代码之前、为玩家添加的代码之后添加以下代码(现有代码行已突出显示):
// 让LevelUpdate感知玩家
levelUpdate->assemble(nullptr,  playerUpdate);


// 对于平台
for (int i = 0; i < 8; ++i)
{
    GameObject platform;
    shared_ptr<PlatformUpdate> platformUpdate = make_shared<PlatformUpdate>();
    platformUpdate->assemble(nullptr, playerUpdate);
    platform.addComponent(platformUpdate);

    shared_ptr<PlatformGraphics> platformGraphics = make_shared<PlatformGraphics>();

    platformGraphics->assemble( canvas, platformUpdate,
        IntRect(PLATFORM_TEX_LEFT, PLATFORM_TEX_TOP, PLATFORM_TEX_WIDTH, PLATFORM_TEX_HEIGHT));

    platform.addComponent(platformGraphics);
    gameObjects.push_back(platform);

    levelUpdate->addPlatformPosition(
        platformUpdate->getPositionPointer());
}
// 平台部分结束
2
3
4
5
6
7
8
9
10
11
12
13
14
15
16
17
18
19
20
21
22
23
24
在我们添加到Factory.cpp的上述代码中,代码被包含在一个for循环中,该循环执行八次。你可以尝试生成更多或更少的平台,但八个似乎效果不错。在for循环的每次迭代中,会执行以下操作。
首先,我们创建一个名为platform的新GameObject实例和一个名为platformUpdate的PlatformUpdate实例共享指针。然后,我们调用platformUpdate的assemble函数,并传入playerUpdate实例。接下来,我们调用addComponent将platformUpdate添加到platform中。
接着,我们创建一个PlatformGraphics共享指针实例。然后,和所有派生自Graphics的类一样,我们调用assemble函数,并传入VertexArray、platformUpdate实例(作为通用的Update实例)以及纹理坐标。
现在,我们将platformGraphics实例添加到GameObject(platform)中,并调用gameObjects的push_back函数,将platform添加到GameObject实例向量中。
最后,我们使用levelUpdate并调用addPlatformPosition函数,传入调用platformUpdate->getPositionPointer()的结果,这使得LevelUpdate类能够操作我们刚刚创建的平台的位置。for循环确保这个过程再重复七次。
让我们运行游戏,看看进展如何。
# 运行游戏
暂时修改LevelUpdate.h文件中的一行代码,如下所示:
bool m_IsPaused = false;
将m_isPaused改为false将使平台生成。现在,运行游戏。

注意,左上角的计时器正在运行,并且你可以看到平台在玩家身后消失,然后又重新出现在玩家前面。
将m_IsPaused改回true。让我们为玩家角色添加功能。
# 为玩家添加功能
当然,目前玩家还不能做任何事情。我们将通过两种方式改变这一状况。
我们将响应由InputReceiver读取的键盘输入。这将在handleInput函数中进行。此时,玩家将能够移动。完成这一步后,我们将继续为移动添加动画效果。
# 编写玩家控制代码
PlayerUpdate.h已经包含了我们需要的所有变量;我们只需要在PlayerUpdate.cpp文件中使用它们。将handleInput函数的完整代码添加到PlayerUpdate.cpp中。以下是该函数的完整代码:
void PlayerUpdate::handleInput()
{
    if (event.type == Event::KeyPressed)
    {
        if (event.key.code == Keyboard::D)
        {
            m_RightIsHeldDown = true;
        }
        if (event.key.code == Keyboard::A)
        {
            m_LeftIsHeldDown = true;
        }

        if (event.key.code == Keyboard::W)
        {
            m_BoostIsHeldDown = true;
        }

        if (event.key.code == Keyboard::Space)
        {
            m_SpaceHeldDown = true;
        }
    }

    if (event.type == Event::KeyReleased)
    {
        if (event.key.code == Keyboard::D)
        {
            m_RightIsHeldDown = false;
        }

        if (event.key.code == Keyboard::A)
        {
            m_LeftIsHeldDown = false;
        }

        if (event.key.code == Keyboard::W)
        {
            m_BoostIsHeldDown = false;
        }

        if (event.key.code == Keyboard::Space)
        {
            m_SpaceHeldDown = false;
        }
    }

    m_InputReceiver.clearEvents();
}
2
3
4
5
6
7
8
9
10
11
12
13
14
15
16
17
18
19
20
21
22
23
24
25
26
27
28
29
30
31
32
33
34
35
36
37
38
39
40
41
42
43
44
45
46
47
48
49
在上述代码中有两个if语句。第一个在键盘按键被按下时执行,另一个在键盘按键被释放时执行。对于这两种情况,我们对W、A、D键和空格键做出响应。对于每个按键和移动(上下)的组合,我们设置一个布尔变量。现在,我们可以在update函数中根据所有按键的状态做出响应。请记住,update函数是调用handleInput函数的地方。因此,在调用handleInput之后,我们将根据刚刚设置的布尔变量做出响应。
接下来,我们将把update函数的代码添加到PlayerUpdate.cpp中,但我们会分小部分添加。以下是将update函数分解成易于管理的部分。注意,现有的一行代码位置有变动。从头开始编写这个函数会更简单,如下所示。这是一个很长的函数,但我将其分成了多个部分进行编写和解释。你可以先添加所有部分,然后再回过头来依次检查每个部分,选择你觉得最舒服的方式就行。如果对update函数中代码的顺序或位置有任何疑问,请参考Run4文件夹中PlayerUpdate.cpp文件中的代码。
所有代码都在这个结构内部。首先添加以下代码:
void PlayerUpdate::update(float timeTakenThisFrame)
{
    if (!*m_IsPaused)
    {
        // 其余所有代码
    }
}
2
3
4
5
6
7
在上述代码中,我们首先检查游戏是否暂停。如果游戏暂停,update函数中的任何代码都不会执行。
其余所有代码都放在注释// 其余所有代码下面。接下来,添加以下代码:
m_Position.top += m_Gravity *
    timeTakenThisFrame;
handleInput();
if (m_IsGrounded)
{
    if (m_RightIsHeldDown)
    {
        m_Position.left +=
            timeTakenThisFrame * m_RunSpeed;
    }

    if (m_LeftIsHeldDown)
    {
        m_Position.left -=
            timeTakenThisFrame * m_RunSpeed;
    }
}
2
3
4
5
6
7
8
9
10
11
12
13
14
15
16
17
注意,在上述代码中,我们测试了之前在handleInput函数中设置的布尔变量的值,并根据m_Position中保存的值的变化做出响应。
第一行代码(除了游戏暂停时)总是会执行,它根据重力强度(m_Gravity)乘以主游戏循环执行的时间(m_TimeTakenThisFrame),将玩家在游戏世界中向下推动。
现在,调用handleInput函数来设置所有布尔变量。接下来的if语句检查玩家是否在地面上。这样做的原因是,我们只希望在玩家在地面上时响应玩家向左或向右的移动操作,因为玩家不能在半空中跑步。如果玩家在地面上,并且玩家按住向左或向右的键(A或D),那么根据游戏循环所花费的时间和玩家的速度(m_RunSpeed),相应地向左或向右移动m_Position。
为了处理更多的移动操作,接下来添加以下代码:
if (m_BoostIsHeldDown)
{
    m_Position.top -=
        timeTakenThisFrame * m_BoostSpeed;

    if (m_RightIsHeldDown)
    {
        m_Position.left +=
            timeTakenThisFrame * m_RunSpeed / 4;
    }

    if (m_LeftIsHeldDown)
    {
        m_Position.left -=
            timeTakenThisFrame * m_RunSpeed / 4;
    }
}
2
3
4
5
6
7
8
9
10
11
12
13
14
15
16
17
上述代码只有在按下加速按钮(W)时才会执行。如果按下加速按钮,玩家会根据加速力度(m_BoostSpeed)和当前帧执行的时间在游戏世界中向上移动。除了向上移动,如果按住A或D键,玩家会像在地面上跑步一样向左或向右移动。不过,注意移动量会除以4。这是为了使加速时向左或向右移动变得缓慢且不方便。这样一来,单纯通过向右加速来获取高分的方法就行不通了。加速功能仅用于紧急情况,比如从平台上掉落或者在飞来的火球上方悬停。
接下来,添加这段代码:
// 处理跳跃
if (m_SpaceHeldDown &&!m_InJump && m_IsGrounded)
{
    SoundEngine::playJump();
    m_InJump = true;
    m_JumpClock.restart();
}

if (!m_SpaceHeldDown)
{
    //mInJump  = false;
}
2
3
4
5
6
7
8
9
10
11
12
上述代码通过检测玩家是否在触地的同时按下空格键,来判断玩家是否尝试跳跃。如果满足条件,就会播放跳跃音效,将m_InJump设置为true,并重启时钟(m_JumpClock),开始计算玩家跳跃的时长。
接着,在update函数的最后部分添加这段代码:
if (m_InJump)
{
    if (m_JumpClock.getElapsedTime().asSeconds() < m_JumpDuration / 2)
    {
        // 上升阶段
        m_Position.top -= m_JumpSpeed * timeTakenThisFrame;
    }
    else
    {
        // 下降阶段
        m_Position.top += m_JumpSpeed * timeTakenThisFrame;
    }

    if (m_JumpClock.getElapsedTime().asSeconds() > m_JumpDuration)
    {
        m_InJump = false;
    }

    if (m_RightIsHeldDown)
    {
        m_Position.left += timeTakenThisFrame * m_RunSpeed;
    }

    if (m_LeftIsHeldDown)
    {
        m_Position.left -= timeTakenThisFrame * m_RunSpeed;
    }
}// 结束if(m_InJump)

m_IsGrounded = false;
2
3
4
5
6
7
8
9
10
11
12
13
14
15
16
17
18
19
20
21
22
23
24
25
26
27
28
29
30
上述所有代码用于控制玩家处于跳跃状态(由布尔值m_InJump决定)时的动作。在确定玩家正在跳跃后,第一个if语句通过以下代码检测跳跃阶段是否超过中点:
if (m_JumpClock.getElapsedTime().asSeconds() < m_JumpDuration / 2)
如果未超过中点,玩家就会向上移动(在if代码块中);如果超过中点,else代码块中的代码会使玩家向下移动。
接下来,以下代码用于判断是否到了结束跳跃的时间。代码如下:
if (m_JumpClock.getElapsedTime().asSeconds() > m_JumpDuration)
{
    m_InJump = false;
}
2
3
4
最后,在跳跃部分的代码中,检测左右方向键,若按下相应按键,玩家就会向左或向右移动。注意,玩家在跳跃时的移动速度与奔跑时相同。这在一定程度上符合科学原理,但主要的一点是,尽可能选择奔跑和跳跃,而不是使用冲刺。
# 运行游戏
此时,如果LevelUpdate.h文件中的代码还未修改,你可以修改其中一行代码,如下所示:
bool m_IsPaused = false;
这样,你就能看到玩家在关卡中滑行、跳跃和冲刺,但没有任何动画效果。
 图18.3:无动画的玩家移动
接下来,我们将为玩家添加动画,因为这不是一个滑冰游戏。我们分两个阶段来实现。首先,创建一个类,从纹理图集(texture atlas)中选取动画帧(一组纹理坐标);然后,在PlayerGraphics类中添加代码,使用Animator类的实例,并添加更多代码。
# 编写Animator类
首先,让我们让Animator类运行起来。Animator类也会被FireballGraphics类和RainGraphics类使用。任何想要循环播放一组动画帧的类都可以使用它。只要动画帧大小均匀、间距相等且垂直坐标相同,就可以为任何一组动画配置该类。使用它的代码可以对Animator类进行配置,以反转动画顺序,当玩家向相反方向奔跑时,这很有用,我们很快就会看到。反转动画还可以产生太空步的效果,不过这一点就留给读者去探索了。动画的每秒帧数和总帧数也可以在运行时确定。
创建一个名为Animator的类(如果还没有创建的话)。在Animator.h中添加以下代码:
#pragma once
#include<SFML/Graphics.hpp>
using namespace sf;

class Animator
{
private:
    IntRect m_SourceRect;
    int m_LeftOffset;
    int m_FrameCount;
    int m_CurrentFrame;
    int m_FramePeriod;
    int m_FrameWidth;
    int m_FPS = 12;
    Clock m_Clock;
public:
    Animator(
        int leftOffset, int topOffset, int frameCount,
        int textureWidth, int textureHeight, int fps);

    IntRect* getCurrentFrame(bool reversed);
};
2
3
4
5
6
7
8
9
10
11
12
13
14
15
16
17
18
19
20
21
22
让我们逐行分析刚刚编写的Animator.h文件。名为m_SourceRect的IntRect实例将保存纹理图集中当前动画帧的整数坐标。
m_LeftOffset变量用于记录定义当前动画帧左侧的水平值。在代码中我们很快会看到,通过给这个值加上m_FrameWidth,就能移动到下一组纹理坐标。
名为m_FrameCount的整数存储动画序列的总帧数。m_CurrentFrame变量表示当前要绘制的帧号。
名为m_FramePeriod的整数是每一帧动画的持续时间。它通过1除以总帧数来计算。
整数m_FrameWidth保存一帧动画的宽度。对于给定的一组动画,这个值不会改变。
m_FPS变量将保存每秒要播放的动画帧数。Clock实例m_Clock用于记录动画帧率的时间。
Animator构造函数有以下参数:int leftOffset、int topOffset、int frameCount、int textureWidth、int textureHeight和int fps。这些参数都与其中一个成员变量相对应,并将进行相应赋值。
getCurrentFrame函数负责计算当前要绘制的帧,并以IntRect指针的形式返回纹理图集中纹理的坐标。布尔型参数reversed用于指示函数,当reversed设置为true时,按从右到左的顺序计算纹理图集中的帧。
现在,在Animator.cpp中编写实现代码。首先,在Animator.cpp中添加构造函数的实现代码,如下所示:
#include "Animator.h"

Animator::Animator(
    int leftOffset, int topOffset,
    int frameCount,
    int textureWidth, int textureHeight, int fps)
{
    m_LeftOffset = leftOffset;
    m_CurrentFrame = 0;
    m_FrameCount = frameCount;
    m_FrameWidth = (float)textureWidth / m_FrameCount;
    m_SourceRect.left = leftOffset;
    m_SourceRect.top = topOffset;
    m_SourceRect.width = m_FrameWidth;
    m_SourceRect.height = textureHeight;
    m_FPS = fps;
    m_FramePeriod = 1000 / m_FPS;
    m_Clock.restart();
}
2
3
4
5
6
7
8
9
10
11
12
13
14
15
16
17
18
19
在上述Animator构造函数的代码中,对leftOffset、currentFrame和frameCount的值进行了初始化。通过将纹理宽度除以总帧数来计算帧宽度。使用左偏移、上偏移、帧宽度和纹理高度,对保存当前纹理坐标的IntRect(m_SourceRect)的起始值进行初始化。考虑到所有动画帧都在等间距的一行中,这样做是合理的。
接下来,在Animator.cpp中添加getCurrentFrame函数:
IntRect* Animator::getCurrentFrame(bool reversed)
{
    // 反转绘制纹理时,帧编号加1
    // 这是因为反转(水平翻转)的纹理是从右到左绘制像素的

    if (m_Clock.getElapsedTime().asMilliseconds()
        > m_FramePeriod)
    {
        m_CurrentFrame++;
        if (m_CurrentFrame >= m_FrameCount + reversed)
        {
            m_CurrentFrame = 0 + reversed;
        }
        m_Clock.restart();
    }

    m_SourceRect.left = m_LeftOffset + m_CurrentFrame
        * m_FrameWidth;

    return &m_SourceRect;
}
2
3
4
5
6
7
8
9
10
11
12
13
14
15
16
17
18
19
20
21
在getCurrentFrame函数中,第一个if语句检查是否到了切换到下一帧的时间。如果是,则增加m_CurrentFrame的值。下一个if语句确保没有超过最后一帧。如果超过了,在if代码块中将帧号设置为零。倒数第二行代码初始化m_SourceRect中的纹理坐标,然后将m_SourceRect返回给调用代码。现在,我们继续编写调用刚刚编写的函数的PlayerGraphics类。
# 编写玩家动画
在本节中,我们将使用刚刚编写的Animator类。显然,我们会使用getCurrentFrame函数,但此外,我们还将引用纹理图集中的各个帧,比如玩家冲刺的帧,如下所示。
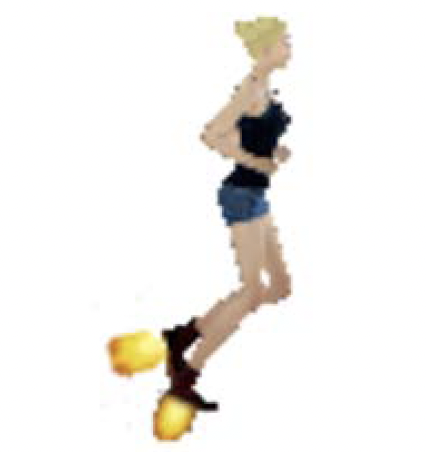 图18.4:玩家冲刺
此外,我们已经了解到Animator类可以反转动画帧的播放顺序,但当玩家向左时,我们还需要水平翻转纹理。在这段代码中,我们将看到如何检测是否需要翻转纹理以及如何进行翻转。例如,前面的图片有时需要像这样绘制:
 图18.5:翻转后的玩家冲刺
实现这一点非常简单快捷,很快我们就能在所有玩家图像上看到效果。PlayerGraphics.h文件包含了我们所需的一切;只需取消注释以下代码:
// We  will  come  back  to  this  soon
class Animator;
2
以及以下代码:
// We  will  come  back  to  this  soon
Animator* m_Animator;
2
我们刚刚所做的是添加了一个Animator实例,并对Animator类进行了前向声明。
现在,我们只需要在PlayerGraphics.cpp中添加一些代码。首先,在PlayerGraphics.cpp中添加一个包含指令:
#include "Animator.h"
现在有了Animator,我们之前在assemble函数中编写的许多代码不再需要,因此可以用以下代码替换PlayerGraphics的assemble函数:
void PlayerGraphics::assemble(VertexArray& canvas, shared_ptr<Update> genericUpdate,
    IntRect texCoords)
{
    m_PlayerUpdate = static_pointer_cast<PlayerUpdate>(genericUpdate);
    m_Position = m_PlayerUpdate->getPositionPointer();

    m_Animator = new Animator(
        texCoords.left,
        texCoords.top,
        6,//  6帧
        texCoords.width * 6, texCoords.height,
        12);//  帧率

    // 获取动画的第一帧
    m_SectionToDraw = m_Animator->getCurrentFrame(false);
    m_StandingStillSectionToDraw = m_Animator->getCurrentFrame(false);

    m_VertexStartIndex = canvas.getVertexCount();
    canvas.resize(canvas.getVertexCount() + 4);
}
2
3
4
5
6
7
8
9
10
11
12
13
14
15
16
17
18
19
20
在更新后的assemble函数中,我们通过将Update实例转换为PlayerUpdate实例,并调用getPositionPointer函数,获取PlayerUpdate类中玩家位置的指针。
接下来,我们调用new来初始化Animator实例,并传入所需的参数,包括指定纹理的左坐标和上坐标、总共6帧、总宽度和高度,以及每秒12帧的帧率。我们之前编写的Animator类将使用这些数据,每当我们调用getCurrentFrame函数时,就会提供正确的动画帧。我们本可以将getCurrentFrame作为PlayerGraphics类的一个函数,但这样一来,我们就无法轻松地在火球和雨滴效果上使用它。由于有了Animator类,我们可以根据需要多次重用它,并且会在火球和雨滴效果中使用它。
代码的下一行通过调用getCurrentFrame函数来初始化m_SectionToDraw的IntRect。然后,我们再次调用相同的函数来初始化m_StandingStillSectionToDraw。这第一帧将用于玩家静止时。
最后,在assemble函数中,通过调用canvas.getVertexCount并将返回值减1,来保存四边形起始顶点的位置。然后,我们可以通过调用canvas.resize来扩展VertexArray。
draw函数也进行了彻底修改,因此我们将用以下代码完全替换PlayerGraphics.cpp中的draw函数。
draw函数很长,但将它拆分成更多函数并没有特别大的帮助,所以我只把它分成几个部分来解释。如果你在理解后续任何代码的位置或结构上有困难,建议从Run4文件夹下的PlayerGraphics.cpp文件中复制粘贴整个draw函数。代码并不是特别复杂,但为了绘制玩家角色,我们需要考虑很多种情况。例如:玩家是在移动、跳跃、加速、静止不动,还是向左或向右看?所有这些选项以及这些选项的不同组合都会改变我们绘制玩家角色的方式。先让代码运行起来,运行它、玩一玩,然后再回到这里了解它的工作原理。draw函数的第一部分如下:
void PlayerGraphics::draw(VertexArray& canvas)
{
    const Vector2f& position =
        m_Position->getPosition();
    const Vector2f& scale =
        m_Position->getSize();

    canvas[m_VertexStartIndex].position = position;
    canvas[m_VertexStartIndex + 1].position =
        position + Vector2f(scale.x, 0);
    canvas[m_VertexStartIndex + 2].position = position + scale;
    canvas[m_VertexStartIndex + 3].position =
        position + Vector2f(0, scale.y);

    if (m_PlayerUpdate->m_RightIsHeldDown &&!m_PlayerUpdate->m_InJump &&
       !m_PlayerUpdate->m_BoostIsHeldDown && m_PlayerUpdate->m_IsGrounded)
    {
        m_SectionToDraw = m_Animator->getCurrentFrame(false);
    }

    if (m_PlayerUpdate->m_LeftIsHeldDown &&!m_PlayerUpdate->m_InJump &&
       !m_PlayerUpdate->m_BoostIsHeldDown &&
        m_PlayerUpdate->m_IsGrounded)
    {
        m_SectionToDraw = m_Animator->getCurrentFrame(true);
        //  reversed
    }
    else
    {
        //  Test  the players facing position
        //  in  case  it  changed  while jumping  or  boosting
        //  This  value  is  used  in  the final  animation  option
        if (m_PlayerUpdate->m_LeftIsHeldDown)
        {
            m_LastFacingRight = false;
        }
        else
        {
            m_LastFacingRight = true;
        }
    }
2
3
4
5
6
7
8
9
10
11
12
13
14
15
16
17
18
19
20
21
22
23
24
25
26
27
28
29
30
31
32
33
34
35
36
37
38
39
40
41
在前面这部分代码中,我们设置了顶点的位置,决定是获取前一帧左边还是右边的帧,并设置了m_LastFacingRight变量。在接下来的几个部分中,我们将使用合适的帧并将其放置在VertexArray实例上。
在draw函数中添加以下内容:
const int uPos = m_SectionToDraw->left; const int vPos = m_SectionToDraw->top;
const int texWidth = m_SectionToDraw->width;   const int texHeight = m_SectionToDraw->height;

if (m_PlayerUpdate->m_RightIsHeldDown &&!m_PlayerUpdate->m_InJump &&
   !m_PlayerUpdate->m_BoostIsHeldDown)
{
    canvas[m_VertexStartIndex].texCoords.x = uPos;
    canvas[m_VertexStartIndex].texCoords.y = vPos;

    canvas[m_VertexStartIndex + 1].texCoords.x = uPos + texWidth;
    canvas[m_VertexStartIndex + 1].texCoords.y = vPos;
    canvas[m_VertexStartIndex + 2].texCoords.x = uPos + texWidth;
    canvas[m_VertexStartIndex + 2].texCoords.y = vPos + texHeight;
    canvas[m_VertexStartIndex + 3].texCoords.x = uPos;
    canvas[m_VertexStartIndex + 3].texCoords.y = vPos + texHeight;
}
2
3
4
5
6
7
8
9
10
11
12
13
14
15
16
在前面这部分绘制代码中,我们测试玩家是否按住右键、没有跳跃且没有加速,换句话说,就是玩家正在向右跑。如果是这种情况,我们只想让动画帧按正常方向循环播放。if语句中的代码使用getCurrentFrame函数返回的坐标(存储在m_SectionToDraw中,然后复制到uPos、vPos、texWidth和texHeight中)来设置VertexArray中的纹理坐标。
在draw函数中添加以下代码:
else if (m_PlayerUpdate->m_LeftIsHeldDown &&!m_PlayerUpdate->m_InJump &&
   !m_PlayerUpdate->m_BoostIsHeldDown)
{
    canvas[m_VertexStartIndex].texCoords.x = uPos;
    canvas[m_VertexStartIndex].texCoords.y = vPos;
    canvas[m_VertexStartIndex + 1].texCoords.x = uPos - texWidth;
    canvas[m_VertexStartIndex + 1].texCoords.y = vPos;
    canvas[m_VertexStartIndex + 2].texCoords.x
        = uPos - texWidth;
    canvas[m_VertexStartIndex + 2].texCoords.y
        = vPos + texHeight;
    canvas[m_VertexStartIndex + 3].texCoords.x
        = uPos;
    canvas[m_VertexStartIndex + 3].texCoords.y = vPos + texHeight;
}
2
3
4
5
6
7
8
9
10
11
12
13
14
15
在前面这部分draw函数中,当玩家按住左键、没有跳跃且没有加速时,if语句会执行。这与前面的if语句正好相反,处理的是玩家向左跑的情况。乍一看,代码可能看起来一样,但在处理纹理水平坐标宽度的方式上有一个小变化。第二个和第三个顶点的x坐标是这样计算的:
= uPos - texWidth;
第一个和第三个坐标是这样计算的:
= uPos;
这样做的效果是,在四边形的左侧使用纹理图像右侧的像素,并且在纹理像素中从右向左移动,在四边形上从左向右移动。基本上,这就将图像水平翻转了。当玩家向左看时,这正是我们所需要的。
在draw函数中添加以下内容:
else if (m_PlayerUpdate->m_RightIsHeldDown && m_PlayerUpdate->m_BoostIsHeldDown)
{
    canvas[m_VertexStartIndex].texCoords.x = BOOST_TEX_LEFT;
    canvas[m_VertexStartIndex].texCoords.y =
        BOOST_TEX_TOP;
    canvas[m_VertexStartIndex + 1].texCoords.x =
        BOOST_TEX_LEFT + BOOST_TEX_WIDTH;
    canvas[m_VertexStartIndex + 1].texCoords.y =
        BOOST_TEX_TOP;
    canvas[m_VertexStartIndex + 2].texCoords.x =
        BOOST_TEX_LEFT + BOOST_TEX_WIDTH;
    canvas[m_VertexStartIndex + 2].texCoords.y =
        BOOST_TEX_TOP + BOOST_TEX_HEIGHT;
    canvas[m_VertexStartIndex + 3].texCoords.x =
        BOOST_TEX_LEFT;
    canvas[m_VertexStartIndex + 3].texCoords.y =
        BOOST_TEX_TOP + BOOST_TEX_HEIGHT; }
2
3
4
5
6
7
8
9
10
11
12
13
14
15
16
17
在前面这部分代码中,当玩家按住右键并加速时,if语句会执行。if语句中的纹理坐标是使用代表纹理集(texture atlas)中加速图形的整型常量来设置的。这些常量是BOOST_TEX_LEFT、BOOST_TEX_TOP、BOOST_TEX_WIDTH和BOOST_TEX_HEIGHT。
在draw函数中添加以下内容:
else if (m_PlayerUpdate->m_LeftIsHeldDown && m_PlayerUpdate->m_BoostIsHeldDown)
{
    canvas[m_VertexStartIndex].texCoords.x =
        BOOST_TEX_LEFT + BOOST_TEX_WIDTH;
    canvas[m_VertexStartIndex].texCoords.y = 0;
    canvas[m_VertexStartIndex + 1].texCoords.x = BOOST_TEX_LEFT;
    canvas[m_VertexStartIndex + 1].texCoords.y = 0;
    canvas[m_VertexStartIndex + 2].texCoords.x = BOOST_TEX_LEFT;
    canvas[m_VertexStartIndex + 2].texCoords.y = 100; canvas[m_VertexStartIndex + 3].texCoords.x =
        BOOST_TEX_LEFT + BOOST_TEX_WIDTH;
    canvas[m_VertexStartIndex + 3].texCoords.y = 100;
}
2
3
4
5
6
7
8
9
10
11
12
在前面的if语句中,当玩家向左加速时,代码会执行。同样,我们使用代表加速图像的常量,并且和玩家向左跑时一样,我们翻转水平坐标并从右向左读取像素,以便在屏幕上绘制玩家图形时,玩家图形向左。
在draw函数中添加以下内容:
else if (m_PlayerUpdate->m_BoostIsHeldDown)
{
    canvas[m_VertexStartIndex].texCoords.x = BOOST_TEX_LEFT;

    canvas[m_VertexStartIndex].texCoords.y = BOOST_TEX_TOP;
    canvas[m_VertexStartIndex + 1].texCoords.x
        = BOOST_TEX_LEFT + BOOST_TEX_WIDTH;
    canvas[m_VertexStartIndex + 1].texCoords.y
        = BOOST_TEX_TOP;
    canvas[m_VertexStartIndex + 2].texCoords.x
        = BOOST_TEX_LEFT + BOOST_TEX_WIDTH;
    canvas[m_VertexStartIndex + 2].texCoords.y
        = BOOST_TEX_TOP + BOOST_TEX_HEIGHT;
    canvas[m_VertexStartIndex + 3].texCoords.x
        = BOOST_TEX_LEFT;
    canvas[m_VertexStartIndex + 3].texCoords.y  = BOOST_TEX_TOP + BOOST_TEX_HEIGHT   }
2
3
4
5
6
7
8
9
10
11
12
13
14
15
16
在前面这部分代码中,当只按住加速按钮时,else if语句会执行。这和向右加速时使用相同的常量。
在draw函数中添加以下内容:
else
{
    if (m_LastFacingRight)
    {
        canvas[m_VertexStartIndex].texCoords.x =
            m_StandingStillSectionToDraw->left;  canvas[m_VertexStartIndex].texCoords.y =
            m_StandingStillSectionToDraw->top;
        canvas[m_VertexStartIndex + 1].texCoords.x =
            m_StandingStillSectionToDraw->left + texWidth; canvas[m_VertexStartIndex + 1].texCoords.y =
            m_StandingStillSectionToDraw->top;
        canvas[m_VertexStartIndex + 2].texCoords.x =
            m_StandingStillSectionToDraw->left + texWidth; canvas[m_VertexStartIndex + 2].texCoords.y =
            m_StandingStillSectionToDraw->top + texHeight; canvas[m_VertexStartIndex + 3].texCoords.x =
            m_StandingStillSectionToDraw->left;
        canvas[m_VertexStartIndex + 3].texCoords.y =
            m_StandingStillSectionToDraw->top + texHeight; }
    else
    {
        canvas[m_VertexStartIndex].texCoords.x =
            m_StandingStillSectionToDraw->left + texWidth; canvas[m_VertexStartIndex].texCoords.y =
            m_StandingStillSectionToDraw->top;
        canvas[m_VertexStartIndex + 1].texCoords.x =
            m_StandingStillSectionToDraw->left;
        canvas[m_VertexStartIndex + 1].texCoords.y =
            m_StandingStillSectionToDraw->top;
        canvas[m_VertexStartIndex + 2].texCoords.x =
            m_StandingStillSectionToDraw->left;
        canvas[m_VertexStartIndex + 2].texCoords.y =
            m_StandingStillSectionToDraw->top + texHeight; canvas[m_VertexStartIndex + 3].texCoords.x =
            m_StandingStillSectionToDraw->left + texWidth; canvas[m_VertexStartIndex + 3].texCoords.y =
            m_StandingStillSectionToDraw->top + texHeight;
    }
  }
}
2
3
4
5
6
7
8
9
10
11
12
13
14
15
16
17
18
19
20
21
22
23
24
25
26
27
28
29
30
31
32
33
34
在前面这部分也是draw函数的最后一部分中,有一个针对其他所有if和else-if语句的最终else子句。这是在其他条件都不满足时执行的最后一种可能情况。它处理玩家静止不动的情况。在else块中有一个if语句,当m_LastFacingRight为true时执行,还有一个else语句,当m_LastFacingRight为false时执行。在这两种情况下,都会使用保存在m_StandingStillSectionToDraw中的坐标来设置纹理坐标。然而,在else语句中,水平坐标会被翻转,这样玩家角色就向左了。
现在,我们可以享受劳动成果并运行游戏了。
# 运行游戏
按如下所示临时修改LevelUpdate.h文件中的一行代码:
bool m_IsPaused = false;
将m_isPaused改为false会让平台生成。现在,运行代码。
 图18.6:查看动画
现在你可以尽情地跑步、加速和跳跃了。一定要测试向左跑的情况,你会发现看起来仍然不错,因为动画是翻转的。
将m_IsPaused改回true,因为我们很快会编写一个处理暂停功能的菜单。
# 总结
在本章中,我们编写了平台相关的代码。不出所料,需要两个类:一个派生自Update,另一个派生自Graphics。我们为玩家添加了控制功能,编写了一个Animator类,并在PlayerGraphics类中使用它,使玩家能够流畅地左右奔跑。在下一章中,我们将首先构建一个菜单来控制暂停、恢复和退出,然后我们将为玩家添加下雨的效果。